
Installation
DIY vs Professional Mini Split Installation in Texas
What a DIY mini split actually saves in Texas, what Texas law requires, and the four failure modes that turn a $1,500 saving into a $4,000 problem.
The short answer
A DIY pre-charged mini split saves roughly $1,200 to $2,000 in Texas, but Texas law requires a TDLR-licensed contractor for most HVAC work on a residence, EPA certification is required to handle refrigerant, and most manufacturer warranties are void without professional installation. For a detached shop or garage where those constraints are lighter, DIY is more defensible than for a house.
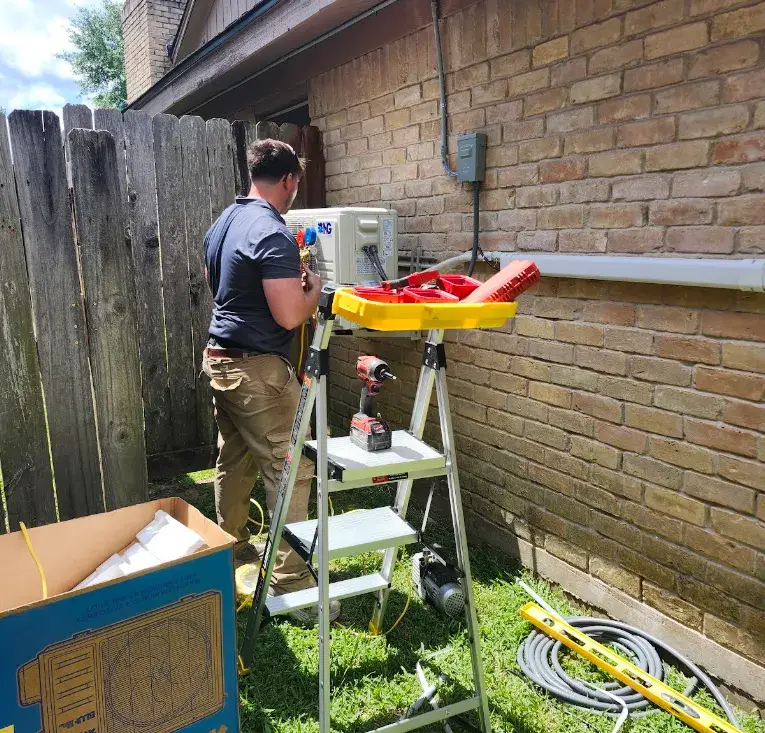
What you actually save
DIY mini split kits ship pre-charged with refrigerant and a quick-connect line set, specifically so a homeowner can install one without evacuating the system. They are legitimate products and they work.
The savings are real but smaller than the sticker comparison suggests:
| DIY kit | Professional install | |
|---|---|---|
| 12,000 BTU equipment | $900–$1,600 | Included |
| Line set and mounting hardware | $150–$300 | Included |
| Electrical (if you hire it out) | $400–$900 | Included in range |
| Labor | Your weekend | Included |
| Total | $1,450–$2,800 | $2,000–$5,500 |
| Warranty | Often limited or void | Full manufacturer + labor |
| Permit and inspection | Your responsibility | Handled |
| Rebate eligibility | Generally none | Yes |
Net saving is typically $1,200 to $2,000 — meaningful, but roughly a third of the total rather than the half people expect. And it comes with the four costs below.
What Texas law actually requires
This is where DIY mini split advice from national sources goes wrong for Texas readers.
HVAC work on a residence generally requires a TDLR license. The Texas Department of Licensing and Regulation regulates air conditioning and refrigeration contracting. There is a narrow homestead exemption in Texas law allowing a homeowner to perform work on their own homestead in some circumstances, but it is narrower than people assume and does not extend to rental property, a home you are preparing to sell, or work requiring a permit that the jurisdiction will not issue to a homeowner.
Handling refrigerant requires EPA Section 608 certification. This is federal, not state. Pre-charged DIY kits are designed around this — the quick-connect fittings mean you theoretically never open the refrigerant circuit. But if a connection leaks and you need to add refrigerant, you cannot legally buy or handle it without certification.
Permits are still required. Most Texas cities require a mechanical permit for a new HVAC system and an electrical permit for a new circuit. Some jurisdictions will issue a homeowner permit; others will not for mechanical work. Unpermitted work surfaces at resale inspection and can complicate an insurance claim after a fire or water event.
Electrical work has its own rules. A dedicated 240V circuit from your panel is not trivial and, in most Texas jurisdictions, requires a licensed electrician for permitted work.
Check your specific jurisdiction before buying a kit. The rules differ between the City of Houston, unincorporated Harris County, and the City of Austin, and “I saw it on YouTube” is not a defense at inspection.
The four ways DIY installs fail
Having established that it is sometimes legal, here is what actually goes wrong. These are ranked by how often they cause problems.
1. Sizing
The most common and most expensive mistake, and it happens before any tool comes out.
Homeowners buying their own equipment size from a chart on the retailer’s website, which uses national rules of thumb. Texas needs more capacity per square foot than those charts assume, and garages, sunrooms, and rooms over garages need far more still.
Get it wrong high and the unit short-cycles, fails to dehumidify — a serious problem on the Gulf Coast — and wears its compressor prematurely. Get it wrong low and it runs flat out and never holds setpoint.
A professional does a load calculation accounting for ceiling height, insulation, glazing, orientation, and infiltration. That is the part you are actually buying.
2. The vacuum step
Professional installations pull a deep vacuum on the refrigerant lines before charging, to remove moisture and non-condensable gases. Moisture in a refrigerant circuit reacts with the oil to form acids that destroy the compressor from the inside, typically over two to five years.
DIY pre-charged kits avoid this with sealed quick-connect fittings. When those seat correctly, it works. When they do not — cross-threaded, over-torqued, or contaminated — you get a slow leak that admits moisture. The system runs fine for a year or two, then fails.
This is the failure mode homeowners never see coming, because the symptom appears long after the install.
3. Line-set handling
Refrigerant lines are soft copper, and they kink. A kinked line restricts flow, which starves the evaporator and stresses the compressor. Flare fittings need a proper flaring tool and correct torque — over-torque cracks the flare, under-torque leaks.
Neither is difficult with the right tools and some practice. Both are easy to get wrong on your first attempt, on a ladder, in August.
4. Condensate management
The indoor unit produces water — a lot of it in humid Texas. The drain line needs continuous downward slope, no traps, and a proper termination. Get this wrong and water backs up into the indoor unit and runs down your wall.
This is the most common DIY callback, and it is usually discovered by a stain on the drywall.
Where DIY is genuinely defensible
Not never. There are cases where the calculus favors it.
A detached shop, barn, or workshop where the structure is not a dwelling, permit requirements are lighter, and a failure means discomfort rather than damage to a finished interior.
A garage where the walls are exposed, drainage is simple, an existing circuit may suffice, and a leak damages nothing.
A space where you accept the warranty risk and the equipment is inexpensive enough that replacing it out of pocket is not catastrophic.
If you have relevant skills. If you have flared copper, pulled a vacuum, or run conduit before, the risk profile is completely different from a first-timer’s.
Where it is a bad idea
Anything in a finished living space. Water damage and mold remediation cost far more than the labor you saved.
Rental property. The homestead exemption does not apply, and unpermitted mechanical work is a liability at inspection and in any insurance claim.
A house you plan to sell soon. Unpermitted HVAC comes up in inspection and gets negotiated against you at more than it cost.
Multi-zone systems. These require proper evacuation, correct refrigerant charge adjustment for line length, and careful commissioning. Pre-charged DIY multi-zone kits are rare for good reason.
If a rebate matters. Utility rebates require a licensed and often program-enrolled contractor. Oncor’s up-to-$600 rebate and CenterPoint’s up-to-$500 both require it. A DIY install forfeits those, which erases a third of the savings immediately. See the rebates guide.
The middle path
A hybrid that works well for a garage or shop: buy the equipment yourself and hire a licensed contractor for installation only.
You control the equipment choice and price. The contractor handles the vacuum, charge, flares, and commissioning, and the installation is permitted and warrantied. Our pricing includes an installation-only option for exactly this case.
You will typically forfeit the manufacturer’s equipment warranty enhancements that come with buying through a dealer, and utility rebate eligibility may still be affected — ask before assuming.
The honest summary
If you are handy, working on a detached structure, and accept that a failure is yours to fix, DIY is a reasonable choice and will probably work.
If it is a finished room in your house, you plan to claim a rebate, you may sell within a few years, or you have never flared a copper line — the $1,200 to $2,000 buys a load calculation, a proper vacuum, a permit, a warranty, and someone to call when something goes wrong. That is not a bad price for those things.
Next steps
See the 2026 cost guide for full installed pricing, garage mini splits for the most DIY-friendly application, or the pricing page for equipment tiers.
This article describes general Texas licensing requirements and is not legal advice. Verify current TDLR rules and your local permitting requirements before undertaking any work.
About the author
John Zoch
John Zoch is a partner at Get Mini Split Quotes, the veteran-owned Houston company that matches Texas homeowners with TDLR-licensed, EPA-certified ductless installers. He works with homeowners and licensed installers across 28 Texas cities, from Gulf Coast humidity problems to Panhandle-edge freeze performance. He writes about what ductless systems actually cost and, just as often, where they are not the right answer.
Published . Last updated . Pricing and program information change — figures are current as of the last update and are estimates, not quotes.
Keep reading
- Texas Mini Split Cost Guide 2026
What ductless mini split installation actually costs in Texas in 2026 — single-zone through whole-home, plus the line items that move the number.
- What Size Mini Split Do I Need? A Texas Sizing Guide
How many BTUs you need by room size, the Texas factors that move that number 30–50%, and why oversizing is the more expensive mistake in Gulf Coast humidity.
- Do You Need a Permit for a Mini Split in Texas? City-by-City Guide
Yes, most Texas cities require a permit for a mini split. What each permit covers, what the inspector checks, and the rules in all 28 Texas cities we serve.